Gingerbread Dough
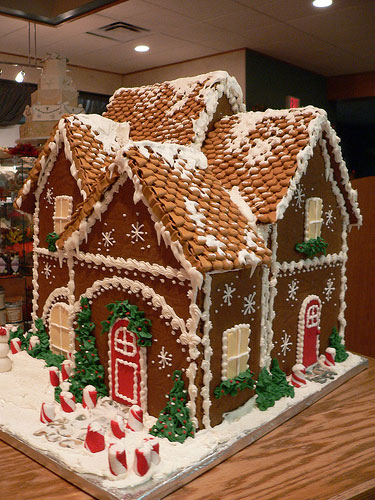 |
| This is not my creation but it sure is awesome |
Whisk together thoroughly:
6 cupls all-purpose flour
½ tsp baking powder
4 tsp ground ginger
4 tsp ground cinnamon
½ tsp ground cloves or allspice
½ tsp salt
Beat on medium speed until
very fluffy and well blended:
12 TBSP (1 ½ sticks) unsalted butter,
softened
1 ½ cups packed light brown sugar
Beat in until well combined:
2 large eggs
1 cup dark molasses
1 TBSP water
Beat half of the flour
mixture into the molasses mixture until well blended and smooth. Stir in the
remaining flour, then knead the mixture until well blended. If the dough is
soft, stir in more flour until it is firmer and more manageable but not at all
dry.
Place the dough in a
sealable plastic bag or airtight plastic container. Set aside in a cool place,
but not he refrigerator, for at least 2 hours or up to 6 hours. Or refrigerate
the dough for up to 3 days; bring to room temp before using.
Meanwhile, cut out pattern
pieces to your desired layout using either graph paper or smooth,
manila-folder-weight paper. Save the pattern for use immediately after pulling
the pieces from the oven.
Position a rack in the
center of the oven. Preheat the oven to 350º. Have ready several cookie sheets.
Divide the dough in half. Working with 1 portion at a time (leave the other
covered to prevent drying), roll out the dough to a scant ¼ inch thick directly
on a large sheet of wax or parchment paper; keep the layer as uniform as
possible. If necessary, dust the rolling pin with flour to prevent sticking.
Before placing pattern
pieces on the dough, lightly rub the surface of the dough with a small amount
of flour. Gently lay as many pattern pieces as will fit on the dough. Using a
sharp knife, wiping blade clean as you work, cut out the pieces of your
pattern. Cut the parchment paper around the pattern pieces and transfer pieces
one at a time gently to the baking sheets taking care to keep the shape of the
pattern.
Bake the pieces until they
are tinged with brown and beginning to darken at the edges, 11-15 minutes.
Remove the sheet from the oven and let stand about 15 minutes to set. At this
point I like to take the pattern pieces out and put them on top of the cooked
pieces to ensure they are still the right size. It is very easy to cut a little
cookie off when they are still hot to maintain the correct size and shape. You
won’t be able to cut the cookies after they are cooled without breaking them so
I highly recommend this step.
Frosting for Construction:
This frosting is not edible
since it uses raw egg whites. I use commercial frosting to decorate so I don’t
worry if my kids pull off candy to eat later.
2 egg whites
3 cups sifted
confectioner's sugar
¼ teaspoon cream of tartar
Combine all of the
ingredients in a large mixing bowl, taking care not to get even a speck of egg
yolk in the mixture. Beat the mixture on high speed for approximately 4
minutes, until light and fluffy. Keep the bowl covered with plastic wrap until
you're ready to use the icing.
Construct
the Basic House
This is where it really
helps to have more than two hands working on a house, and why making a
gingerbread house is so much more fun with company than alone. If you are
working on this alone, it may help to grab some canned goods from the pantry
and use the cans to help prop up the pieces while the icing mortar is drying.
1 Pick a solid base for your gingerbread house -
either a flat cookie sheet, or a thick, sturdy piece of cardboard. If you want,
line the base with aluminum foil or wax paper.
2 Pipe a thick line of icing along a short end of one
of the side pieces. Press the iced side piece against the edge of either the
front or back pieces. Hold in place for a few minutes until the icing is
partially set. Repeat with the other side piece. Prop up with cans if necessary.
Repeat with the other short edges of the side pieces and the remaining
front/back piece. Pipe icing along the seams, inside and outside of the house,
to fill in any gaps and to add extra stability. Pipe icing along the edges of
the house where it meets the base. Let set for at least an hour before
attempting to add the roof pieces.
If any of the gingerbread
house pattern pieces breaks, as can happen easily when working with what are
essentially cookies, most likely you can repair them. On my house I forgot to
cut out the door and window until the front piece had almost completely cooled.
When I went to make the cuts, the piece broke. Fortunately, it was easy to
mortar back together with royal icing. We even created a "splint" out
of cardboard and used royal icing to hold the splint to the piece. Let harden
completely before using the piece for the house construction. When it comes
time to decorate, you can pipe icing right over the broken seam and no one will
be the wiser.
3 Once the royal icing has dried enough so that the
base structure is solid, you can go to work on the roof. Pipe icing all along
the top edges of the structure, front and back and two sides. The roof pieces
are a rectangular shaped. Place the roof pieces so that the long ends of the
rectangle are running along the top of the house. It helps if you have two
people working together to place the roof pieces on the house at the same time
so that they meet easily at the top center, and extend out a little bit,
forming an overhang at each end. Gently hold the roof pieces in place for a few
minutes until they are set enough so they don't slide off when you remove your
hands. Pipe the top seam of the house with extra icing. Let the house stand for
at least an hour, and preferably 8 hours before decorating.


No comments:
Post a Comment